
Avoid some common henna mistakes by following my top 7 tips. These tips will help you to get the best experience when colouring your hair with henna.
1. Get the consistency of your henna mix right!
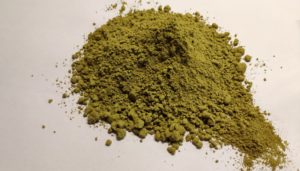
This is important because you’ll want the henna mixture to stay in your Sisterlocks and do what it needs to do. When you mix the henna powder to form a paste, it should be a batter-like consistency; thick enough to spread onto your Sisterlocks but not so thick that when you apply it it pulls at your hair.
It should also be smooth and not lumpy and it needs to be mixed thoroughly – you don’t want any unmixed powder clumps in the mixture. It should also not be too runny either.
If it is too runny, it will find its way out of the cling film. This has happened to me in the past – and I have had henna run down the back of my neck, and down my hairline and into my ears. It can then become horribly messy and if you don’t catch it in time, you could find that drops of henna will drip out and onto your clothes.
You also don’t want the henna to run into your eyes (if it does, rinse out immediately) or onto your clothes because henna will stain anything it comes into contact with.
The other reason why you want to make sure the mixture is thick enough is that once you apply it to your head and wrap it in the cling film, the heat from your head will act as a kind of ‘warming agent’ (we lose around 60% of our body head from our head) and so if the mixture is a little on the runny side, that extra shot of heat will encourage the henna to run rather than to stay put!
2. Be generous with the amount of henna paste you use! That’s right, slap it on thickly – don’t be stingy with it. It’s important to make sure that you use a generous amount of the henna paste, so that you get full coverage and to ensure it gets through the Sisterlocks and onto all the parts of your hair that you would like to cover.
If you don’t use enough – and I have done this – you will miss bits and you may find that because there isn’t enough, the colour won’t take, and you’ll end up having to repeat the henna application process. While this won’t be detrimental to your Sisterlocks, it will be an unnecessary extra task for you – with all the preparation that you will need to do, just because you either missed sections or didn’t mix enough to give yourself the full coverage you need. Better to make too much than not to have enough.
Because of the preparation time – 8-12 hours and up to 24 hours for your henna mixture (henna powder plus water plus EVOO – extra virgin olive oil) to be ready for use – the time needed to release the lawsone dye so that it can bind to your hair once you apply it, you can’t simply mix up more henna to use on the spot.
3. You may need to sieve your henna! Henna is made out of the leaves and twigs of the henna plant and some henna powders contain these from the drying process and they are disastrous if they get stuck in your Sisterlocks!
Body art grade henna powder – is ultra fine and pure and so doesn’t have dried leaves or twigs and the same goes for fine henna powder. But if you’re not using body art quality or fine henna powder, please sift it! It might cost a little more to get fine, pure henna but in my view, it will be worth it!
I have also recently bought the body art quality version and will be trying it when I next colour my hair with henna. I’ll report back in a future post on how it went.
4. Avoid black henna at all costs! I can’t emphasise this one enough. You’ve probably heard of or seen pictures of burnt or damaged skin as a result of black henna being used for henna tattoos.
Unfortunately, there are companies that mix artificial and harmful substances and dyes into henna and then label it as black henna. So check the ingredients and only use reputable or recommended brands.
Pure, natural henna (in other words, henna that does not contain any artificial ingredients) will colour your hair a reddish/orange-brown hue, the amount of red will be determined by the colour of your strands and also by how often you colour – as the reddish-brown hue of henna intensifies with continued use. And if your natural hair colour is light, or grey, the red tones will be more vibrant and more noticeable.
Black henna (labelled as such, and promising to colour your hair black straight out of the packet) is likely to contain PPD – and should not be used; it can result in allergic reactions, burns etc. If you want to restore or keep black hair, use indigo after you apply the henna as a two-step process. I don’t have personal experience of using indigo but the henna powder brand I have been using for the past 3 years also produces indigo powder, and full instructions are available on the packet.
5. 5 hours is plenty! In my opinion, and in my experience, once you have mixed your henna paste and allowed the lawsone dye to be released (by mixing your henna paste and setting it aside for 8 to 12 hours), apply it to your Sisterlocks and leave it on for a maximum of 5 hours.
There really is no need to keep the henna paste on for any longer and certainly no need to leave it on overnight. It isn’t good news for your scalp to go to sleep with a wet, gluggy paste plastered to your hair and scalp. You could catch a cold and you run the risk of the henna oozing out, spreading and staining everywhere.
Henna can be drying, so there’s no need to leave the mixture on longer Than 5 hours. Yes, regular use of henna helps to encourage the growth of thicker and stronger stands, but leaving your Sisterlocks soaked in this way could encourage mildew to form in your Sisterlocks.
6. Apply your henna to your hair as close as possible to your next re-tightening. The first reason is a practical one – when you apply henna, you’re going to be manipulating your hair a lot, so it’s easier when there’s some new growth and your Sisterlocks aren’t tight down to the roots.
Another reason why you’ll want to do your henna colouring as close as possible to your reti is that you’ll be doing a lot of rinsing – rinsing out the henna, then rinsing out the shampoo, and then rinsing out a second application of shampoo. That’s a lot of rinsing, and it will instantly affect your new reti – it won’t look as good.
The other thing is, once you’ve applied the henna and then gone for your reti, you’ll have lovely henna-coated Sisterlocks all the way down to the root.
7. Planning to henna your hairline also? If so, do your hairline last. The hairline is the thinnest area, and even if you are blessed with lush, thick and bountiful edges because they are on the edges, they are more exposed to the air and will dry fast.
Once the henna paste dries, the action of the dye stops and dried-on henna can be hard to wash out! so apply the henna everywhere else first – and just before you put on the cling film, apply the henna paste to your hairline.
So there you have it the 7 tips that will save your Sisterlocks when using henna.
Watch the video on YouTube.